


 SKU: DV/RES/BBPNLMLEKAR
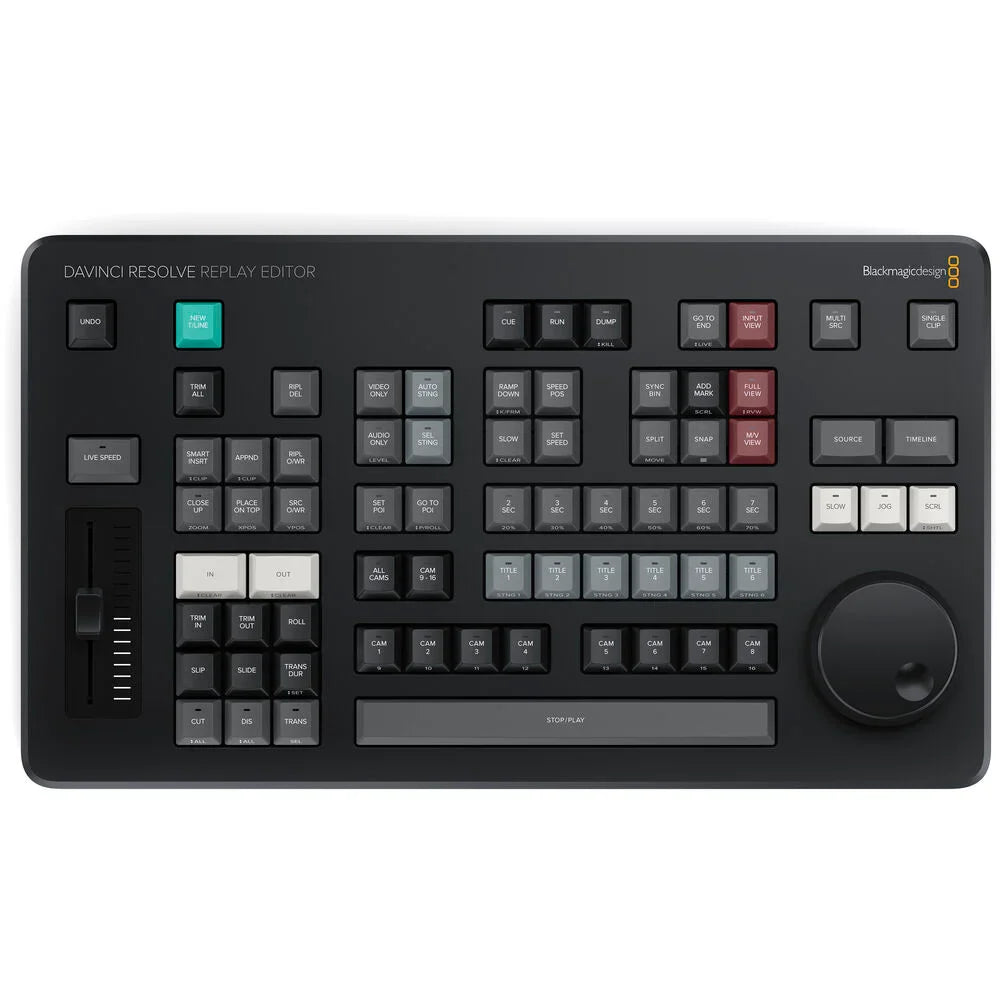
Blackmagic Design DaVinci Resolve Replay Editor
Blackmagic Design DaVinci Resolve Replay Editor
In stock
View full details WhatsApp us for inquiries


?All New Blackmagic Design DaVinci Resolve Replay Editor — Product Guide
On the capture side, the Blackmagic Design DaVinci Resolve Replay Editor provides one control surface for replay and multicamera editing in live sports or newsroom productions. Multiple keys on the panel facilitate switching between sources, setting Point-of-Interests, and triggering auto stinger functions, among other functions. Utilizing Bluetooth 5.1 LE technology, the panel seamlessly integrates into your existing network infrastructure. Its considerable internal battery supports prolonged operation during extended production sessions and can be easily powered on and off through the onboard switch. You can recharge the battery or connect to a separate power supply via the USB-C port.

Live Input Viewing: Guide
Activate the live source button to switch the viewer to a direct source from footage hardware, such as a switcher multi-view. This feature offers a low-latency view of your cameras, allowing you to mark the point of interest (POI) for replay.
 Marking POI: Guide

To mark an event, simply press the POI button or the space bar whenever the source view is chosen. This action sets the POI time based on the footage source timecode and then switches to the source view, cueing to the POI.
Navigating to End: Guide
After an interruption, the GO TO END command jumps directly to the latest frame. From there, you can scroll back to review missed events.
Selecting Best Angle through DaVinci Resolve Replay Editor: Guide
Scroll back to review all camera angles simultaneously, facilitated by DaVinci Resolve Replay Editor's ability to play them into a multi-view. This makes it effortless to identify and choose the optimal angle for replay.
Auto Stinger Activation: Guide
Before initiating a replay, consider enabling the auto stinger feature, which automatically rolls a stinger whenever starting or stopping a replay. Distinct stingers can be chosen through the title keys.
Choosing Transitions: Guide
During replay, utilize the cut and dissolve buttons to choose transition types for sequencing shots. Each time a new camera is chosen, a smooth dissolve transition is applied.
Commencing Replay: Guide
Press the RUN button to commence replay, activating the key channel feed to display the playback on the switcher and initiate the auto stinger. Additionally, logging starts whenever adding the replay to the timeline.
Adjusting Playback Speed with DaVinci Resolve Replay Editor
Refine playback speed in real-time through the slider control. Reduce the viewer and timeline playback rate, then use the search dial to move around the paused section whenever slowing to a stop.
Camera Switching: Guide
Utilize the camera buttons to switch between cameras during playback. The viewer will maintain a multi-view display, with the chosen camera outputted to the footage output, mimicking the operation of a switcher.
Shot Sequencing through DaVinci Resolve Replay Editor: Guide
During on-air playback, selecting a TIME key followed by CAM makes DaVinci Resolve cue the chosen time before the POI for the chosen camera, optionally applying a transition.
Terminating Replay: Guide
Press the DUMP button to halt replay and add the shots to the timeline if one is chosen. This button can additionally trigger the auto stinger, with a slight delay if a new shot sequence has just been initiated.
Creating New Timelines: Guide
Press NEW TIMELINE to save the active sequence immediately and create another with a related name. This streamlined process permits rapid creation of new timelines, ideal for organizing replays efficiently.
Shop by Categories


Explore other brands


